 Epic7DB
 Mid Game - Finishing PvE and early PvP progression
Now that you’re able to farm Wyvern 13, you should take the time to learn how to manage all the gear you’ll be getting. Farming gear will never really stop, since you’ll need gear to build any units you want to use. Due to Speed Set being the most universally usable set, and you now having a lot of units to build, ideally you’ll want to stay in Wyvern for a while to get a good base of Speed Set gear. Eventually you can look at other hunts for more specific gear sets if certain units want those sets. Aside from farming gear, you’ll want to work towards clearing through more PvE content and pushing Arena a bit as well. The subsections here aren’t in a strict order.
At this point your Hunt Expert Challenge should be complete or near complete. You can select Golem or Banshee now, with the final choice being selectable after clearing the one you chose. Picking up another set of the free Atk and HP gear is great and the summons are nice as well. My personal recommendation is to do Banshee first, since you can clear most of Banshee using your Wyvern team. For some of the higher level Banshee stages, you can one shot it using Sigret, Furious, Ras (doesn’t even need SC), and Vivian (free from Banshee Hunt Expert Challenge). Vivian can be thrown into Grace of Growth after you +15 your Sigret, letting you skip building her until later. This lets you clear the missions without investing into any units except for ARas who is the next unit you’re building anyways. You can then use your Azmakalis of Cycle team to clear Golem for Adventurer Path and Hunt Expert Challenge.
Gear/Crafting
Any accessory (necklace/ring) pieces with bad substats on a bad set should be sold for dust to get exp. Bad substat gear on a good set should be extracted for Equipment Cores (explained later). For the other gear slots, you can either extract blues and sell pink+reds if you value gold more, or do the reverse if you value exp more (assuming the gear substats are bad). You should read the Gear Management Guide to help get an idea of what substat combos to look for in gear. There is also a Substat Roll Range and Reforge Substat Increase Table. In terms of determining what gear to reforge, it depends on what your gear standards are. At the start they should be pretty low since you won’t have much gear, but as you get a larger base gear pool, you’ll start looking specifically for upgrades and you’ll raise your standards as a result. You’ll generally want to aim to reforge any pieces that can be used even as your account gets better, I’d personally aim for at worst mid rolled pink pieces.
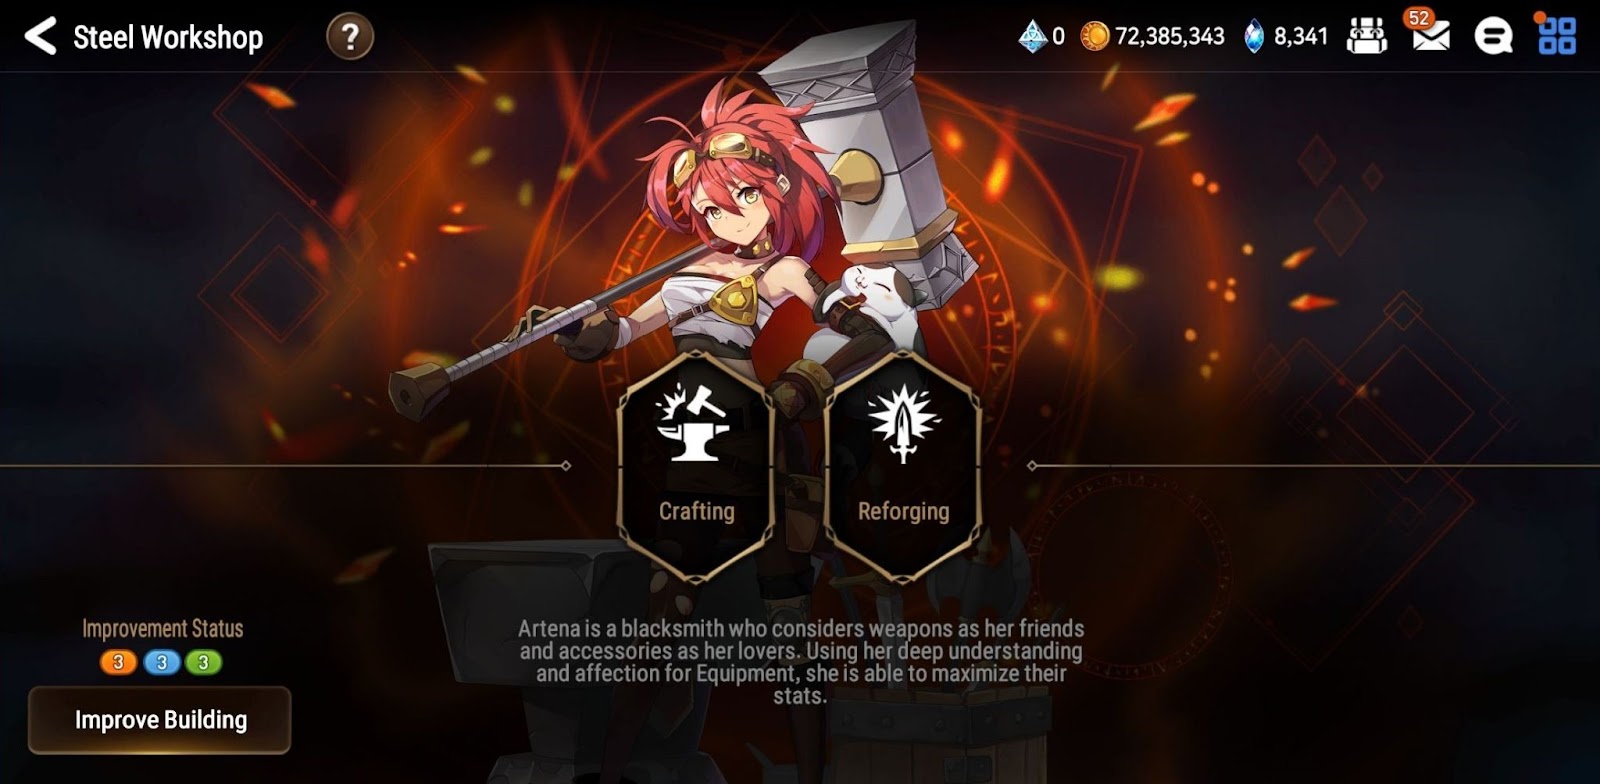
Extract gear with useful sets (like Speed) for Equipment Cores. You’ll need cores to use Equipment Conversion in the Alchemist’s Steeple, which lets you craft a red gear while selecting its main stat. This is where most of your right side gear is going to come from since it allows you to remove main stat rng, though the gems used in selecting mainstat are limited. You can get Conversion Gems in selector or random boxes from Guild Shop, World Boss, Transmit Shop, Automaton Tower and Expedition. Blue gems are flat stats and orange gems are % stats. The only blue gem you should take from a selector box is Speed, but if you get other gems from random boxes then you should use them. Equipment cores are also used to craft charms weekly in the Alchemist’s Steeple which is where you should use cores for bad sets such as Hit Set.
After you’ve maxed the Steel Workshop, you can use your crafting mats to make gear. You should only craft level 85 gear. I recommend crafting right side gear only if you need cores to make conversion gear. If you don’t need any cores you should craft left side since there’s no main stat rng, so you’re much more likely to get a good piece. Epic Crafting gives you a guaranteed red piece but you can’t select the main stat and should typically be used on left side gear.
In terms of what gear to put on units for early PvE, aside from the free gear you’re given, you can generally follow the rule of Speed Set and Speed main stat boots on all units. If they’re a tank, then focus Health (HP), Defense (Def), and if they have debuffs, Eff. Some tanks might want Effect Resistance (EffRes) as well, but those are much more specific. If they’re a damage dealer, then focus Attack (Atk), CritC, Critical Hit Damage (CritD), and if they have useful debuffs, Eff. You can check the Hero Journal Discord for recommended builds for a variety of units.
There is also the occasional Artena Crafting Event where you’re allowed to select a piece of gear and spend points to try to the right substat combination before claiming the gear. This is extremely high value since you’ll essentially get to choose a piece of gear with the substats you want. This should only ever be used on right side gear since those are harder to get and you can read the Artena Crafting Guide for more details on what substat combinations to look for.
Adventure
You’ll want to push through to Ep2 10-10 at the very least to unlock Ras’s SC, Adventurer Ras (ARas). ARas is an amazing unit for both PvE and PvP, and he’ll be a core unit for your progression through mid game. One thing to note is that one of his missions is to acquire 200 Greater Runes from Spirit Altar, so if there is a 2x Rune buff event coming up, you might want to unlock his SC immediately so you can get that out of the way during the buff event.
You can stop here for now if you want, or keep pushing through the rest of the story. Ep3 is an increase in difficulty from Episode 2 and it will make your urgent missions a bit harder to clear. The missions will now ask for a Hero of a specific element or class, but you’ll no longer need to keep 3 Heroes alive which is nice due to the difficulty increase. Clearing the rest of the story gives you the usual rewards for clearing a chapter as well as a couple of bonuses.
You can check the Adventure Guide if you get stuck on any stages.
After clearing Ep3 10-10, you can get an upgrade to Meru, giving her 15% Atk, a 50% HP Revive, and her exclusive artifact “Magic for Friends”. Meru is still a solid unit for PvE without her upgrade and arti, but she does need it for PvP.
You’ll also unlock the Selective Summon Season 2. You can read the Selection Summon Season 2 section of this guide for a more in depth overview of the choices.
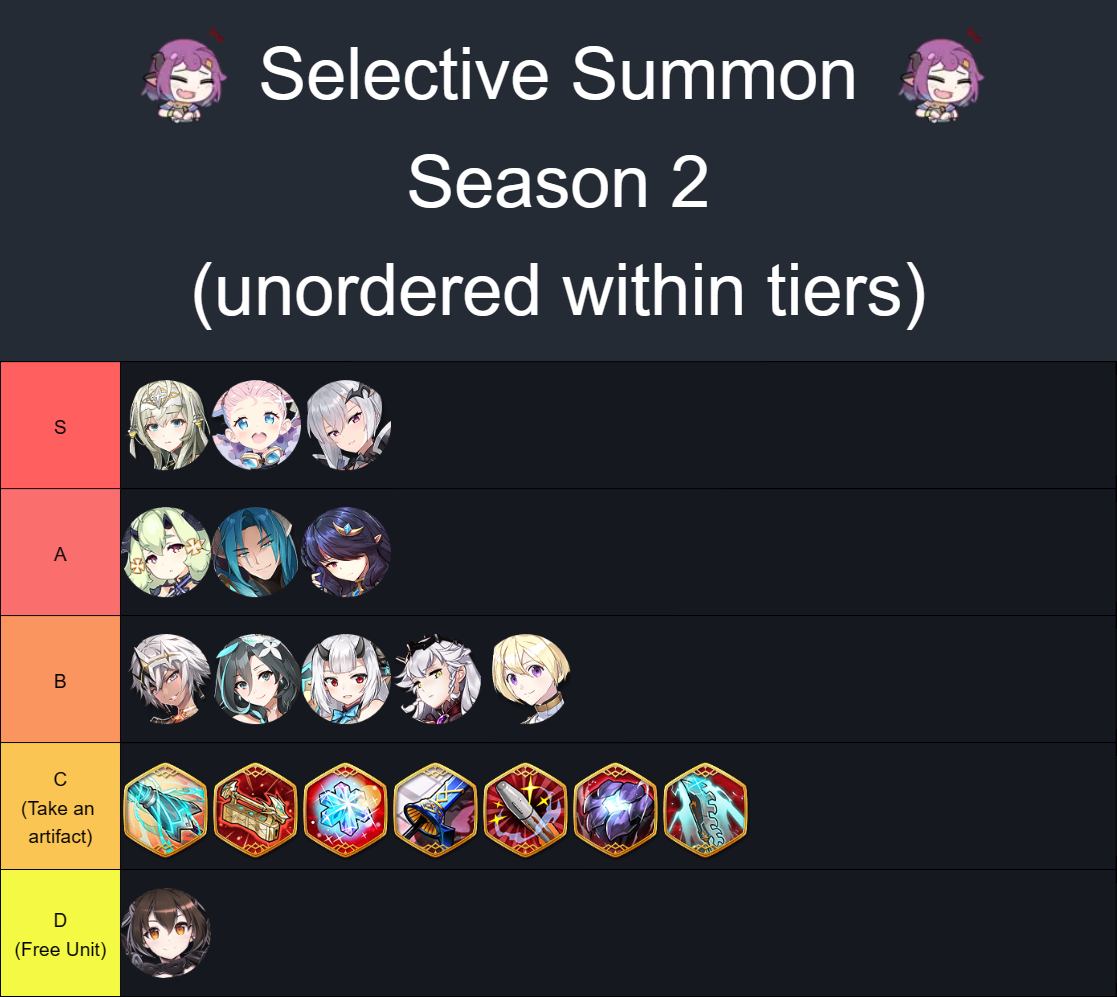
NOTE: Yufine or Ervalen are high priority if you want to do Banshee hunt and don't own Baiken or Straze or Midnight Gala Lilias or Bellona or ae-Giselle or Ram (The latter two are harder to one shot with). You can check the guide in the Banshee 13 section for more details.
One thing to note is that Politis has a horrible artifact tied to her banner, while Choux and Senya both have good artifacts. Senya in particular needs her artifact to function properly so you’d get better value rolling for her rather than taking her from the selective unless you already have her artifact. If you already have Senya and don’t want any of the units below Senya, you could consider grabbing her artifact from here if needed.
Ep4 1-10 rewards you with Adin, who can be upgraded as you continue with the story. She can undergo 4 different specialty changes, with her Earth form being great for PvE and her Light form being great for PvP. There are a bunch of missions you’ll need to clear to fully unlock Adin. You can find the best farming spots for these missions in the Specialty Change guide. There’s also a mission to promote her to 6 star at one point, so using a Potion of Ascension on her is a great investment. These missions will provide materials for her skill enhancements and skill tree, making her really easy to build.
There is an easy 4-10-10 One Shot for the final fight as well.
Moonlight Theater

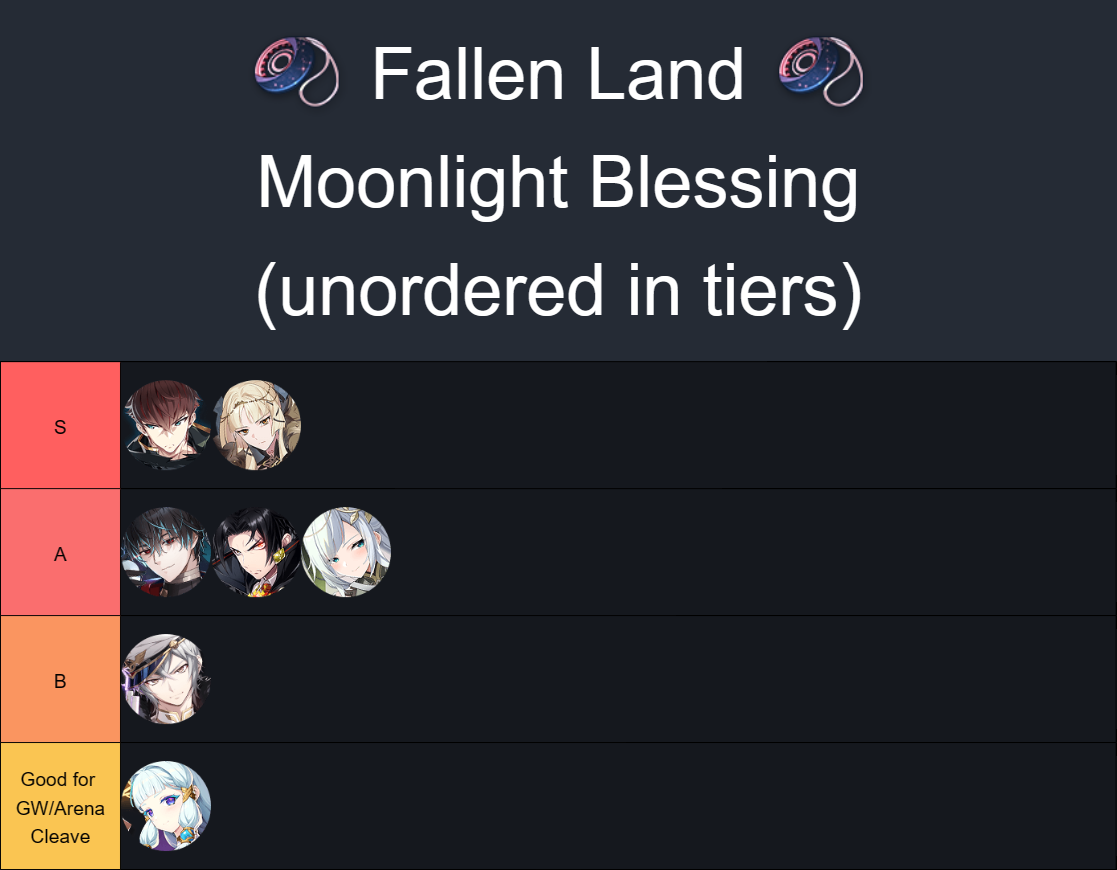
Upon completing the “Fallen Land” Act 1 and Act 2 stories, you will unlock the Fallen Land Moonlight Blessing if you’ve fully completed the first one. If you’re in a hurry to get the hero you could consider buying tickets to rush, otherwise just use the free entries. The notable missions here are clearing Episode 4 10-10 and getting 4 units to level 60. You can use the easy to setup one shot for 4-10-10 in the section above if needed.
The Book of Memories

The Book of Memories is unlocked after clearing Ep2 10-10. This is where special side stories that will no longer be rerun can be found. It costs 1 Milestone in Time to unlock a special side story, which can be purchased in the Normal Shop for 900 skystones.
There are a few side stories that are worth considering which I’ll list below, but none of them are mandatory and you should prioritize further mid game progression first.
A Small Miracle: 40 skin tickets
Reingar’s Chaotic Full Moon Festival: Midnight Bloom artifact (+8-16% CritC to all units, great for PvE)
The Holy Order of the Blue Cross and the Mysterious Island: Super Duper Water Shooter artifact (+5% Atk and +5-10% Eff, great for PvE). Also has a molagora, some filler Res gear, and a cute pet.
The Shadow of Ravenwing Manor: Chatty artifact (PvP artifact for a couple of units, right now it’s just Sylvain Sage Vivian and Roy Mustang as its users)
Royal Capital Akmakalis
Royal Capital Azmakalis unlocks when you reach account rank 60. There are 5 bosses at the ends of each pathway. The priority here is to kill Queen Azumashik so that you can unlock Azmakalis of Cycle. Her pathway is locked initially and will be unlocked after killing Devourer Arahakan. Once you kill the Queen, you should start investing your compasses into Malicious Bug Charms unless you still need to push Nixied 5. Clearing this to 100% is too expensive imo, I wouldn’t do it until you can either make a 52 morale team or can set up Yufilab (requires Yufine and some support units).
Some parts of this are outdated since it was made before this area got reworked, but you can check the Normal Raid Guide for some details on the boss’s mechanics which have not changed.
The recommended units here are all free to acquire and used in multiple PvE content. The same teams will be used for Azmakalis of Cycle later as well.
Use one of these teams to take out Devourer Arahakan.
Devourer Arahakan Team 1
-


Mercedes
 Fire Mage
 -

Adventurer Ras
Fire Knight -


Lorina
Dark Warrior -


Angelic Montmorancy
Ice Soul Weaver
Devourer Arahakan Team 2
-
Mercedes
Fire Mage -
Adventurer Ras
Fire Knight -

Specter Tenebria
Dark Mage -
Angelic Montmorancy
Ice Soul Weaver
Then one of these teams for Queen Azumashik. If you didn’t take Iseria from Selective Summon, Falconer Kluri can be a substitute.
Queen Azumashik Team 1
-
Adventurer Ras
Fire Knight -


Iseria
Earth Ranger -
Lorina
Dark Warrior -
Angelic Montmorancy
Ice Soul Weaver
Queen Azumashik Team 2
-
Adventurer Ras
Fire Knight -
Iseria
Earth Ranger -
Specter Tenebria
Dark Mage -
Angelic Montmorancy
Ice Soul Weaver
Queen Azumashik Team 3
Queen Azumashik Team 4
-
Adventurer Ras
Fire Knight -
Iseria
Earth Ranger -
Specter Tenebria
Dark Mage -

Tamarinne
Fire Soul Weaver
100% Royal Capital Azmakalis in 6 Entries: https://i.imgur.com/pN6AnSm.png
This was made assuming you had already unlocked Nightmare Raid (existing players), but you can still follow this when you manage to make a 51 morale team. If you killed Juleeve already, you can finish exploring Juleeve’s section in 1 entry rather than spending 2 (ignore routes 5 and 6, just explore the parts you haven’t yet). The corners that aren’t explored can be explored by walking into them at -50 morale, dying, and using your free respawn (once per entry). It’ll count as explored when you respawn.
Yufilab 100% in 1 Entry: https://youtu.be/4XbfL7m91E8
This lets you fully clear Azmakalis in one entry if you have a Yufine built, though it takes 3 hours to do and there’s a chance Yufine just dies 30 minutes in while you’re setting up.
Azmakalis of Cycle
Azmakalis of Cycle unlocks after defeating Queen Azumashik in Royal Capital Azmakalis. There are two difficulties available, Normal Mode and Nightmare Mode. You’ll also hear Normal Mode referred to as Hell Raid, since that’s what it used to be called.
This Labyrinth differs from the others in that the mobs do not reset every time you exit, they respawn at the end of each month instead. It’s important to get at least Normal Mode set up quickly since there are very valuable rewards from Cycle.
Both modes require Malicious Bug Charms as the entry fee. Each charm can be bought for 3 compasses in the Labyrinth Shop, with Normal Mode requiring 1 per entry and Nightmare mode requiring 2 per entry.
Normal and Nightmare are linked together, meaning that if you defeat a boss in one difficulty, it will be dead in the other one as well. You should kill any bosses that you are able to in Nightmare Mode, then do the rest of them in Normal instead. Also, if you enter Nightmare Mode, any units used will be unusable in Nightmare Mode until the reset time (only if you exit via the portal, not if you Yield).
There is a Normal Mode Guide and a Nightmare Mode Guide that goes over the boss mechanics, how to fight the bosses, and recommended units. There are some videos for reference as well.
Nightmare Mode can be challenged at any point you want since you can always go back to Normal Mode if you’re struggling.
Arena (and Guild War)
At this point you’ll probably want to start pushing Arena in order to get more weekly skystones. This will also improve your performance in Guild War since there is a lot of overlap between units used in both places. Improving your Guild War attacks will increase your Armband and Mystic gain. Note that your defenses in both places will tend to get run over since offense is heavily favored, even more so in Guild War. The goal is to just make your defense annoying enough that people aren't going to want to hit it.
A basic arena offense team setup is 1 Healer, 1 Knight, 1 DPS/Bruiser and 1 flex unit. The flex unit can be an additional support or an additional DPS depending on the enemy team. One example team could be ARas, STene, AMomo, Flex. Some other notable units are Emilia, Magic Scholar Doris, Shadow Knight Pyllis, Apocalypse Ravi, Seaside Bellona, Lionheart Cermia, Roana, I’m too lazy to list anymore. For defense you should look to copy common top arena defenses by checking the “Total Ranking'' section in the “Ranking” tab on the right.
For Guild War offense you should generally just look to copy the teams of people who went before you. You’ll typically see the same teams being used on defense so if you get comfortable beating a common defense it’ll make it a lot easier for you in future attacks. For defense you could look to copy common defenses, any defenses that you felt were annoying to fight against, or just slam 6 of your best units that aren’t too squishy.
Much of Arena and Guild War offense is structured around the concept of “AI baiting”. This refers to using units with elemental disadvantage against the opponent to bait their AI into attacking said unit. Notable examples are Krau against Rimuru and Violet, or Magic Scholar Doris against Apocalypse Ravi. There are a few units that break the targeting rule though, with their S3s targeting the highest CR enemy instead.
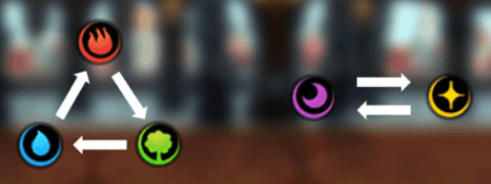
Aside from targeting the unit they have elemental advantage against, enemy units in PvP will then focus on units they are elemental neutral against. If there is no elemental stuff, they’ll target the unit with the lowest maximum HP%. If all units are full HP, they’ll target a unit at random. They also tend to not attack Invincible units even if they have elemental advantage, but they will still target units with Immortal or Skill Nullifier.
Azimanak 13 (A13)
Azimanak (Azi) is typically the next hunt you will farm after Wyvern, providing Immunity, Rage, and Unity sets. Azi helps you move towards setting up Banshee 13 one shot while giving you some PvP gear as well. If you own Baiken (Guilty Gear collab limited character) you can skip A13 and go straight to Banshee if you don’t want Immunity set. You could also skip A13 if you opt to 4 man B13, but I highly recommend setting up a 3 man since the requirements aren’t very high, Immunity gear is used on some PvP units, and it’ll increase your Molagora gain (via friendship farming) as well.
Rage set increases damage dealt by 30% against debuffed enemies. It provides much more damage compared to Destruction Set, making it the best damage set for PvE if you can guarantee debuffs. This makes it very valuable for setting up hunt one shots or even just making standard hunt clears a bit faster. You could also use this to increase your Expedition damage if you like seeing big numbers.
Immunity (Imm) set gives a 1 turn Immunity buff at the start of combat. It is used in PvP on units with high value S3s so that they have a better chance of not being controlled immediately. It’s weak against openers that strip or decrease buff duration before their debuff. You also sacrifice stats by running this set since the alternative 2 piece sets provide stat boosts.
Unity set increases your dual attack chance by 6%. Dual attack is very inconsistent so it is typically unused in favor of Crit or Penetration Set for their consistent value. You could opt to run it on units with very strong S1s or strong passives that are activated by S1 for fun.
There is an Azimanak 13 Guide that covers everything you need to know regarding both slow clear and one shot.
Banshee 13 (B13)

Banshee is generally the next hunt that you should look to farm. These sets are typically used on PvP units and
Lifesteal (LS) set heals for 20% of the damage dealt. Typically used on bruisers with some form of counter mechanic or a spammable high damage AoE. Units with some form of protection built into their kit while still dealing high damage can also benefit from LS.
Counter set gives a 30% chance to counter when attacked. It is used on units with high impact S1s. While this set can be RNG, certain units gain a lot from having a chance at an extra S1 or already have their entire kit built around counters in the first place. You can also use this set just to be a nuisance.
Destruction (Dest) set increases CritD by 60%. It is typically used on bruisers that don’t use LS, Counter, or Injury. It is usable on DPS units as well, but it is hard to use without very specific rolls. 60% CritD from set and 70% CritD from necklace doesn’t give you a lot of wiggle room before you hit the CritD cap. Using a CritC neck has the same issue. An Atk% neck would make this a non-issue, but you lose stat efficiency from the main stat. Bruisers make it much easier to use because they want a wider range of stats. Dest gives the most value out of all the stat giving sets. Spd set is still used for DPS units due to the CritD and CritC caps as well as needing extremely fast Dest gear to reach higher levels of speed. Also since Dest is a damage stat you’d still want Spd gear for tanks and openers. For PvE you could use it to set up hunt one shots or as filler gear for DPS units.
Resist (Res) set increases EffRes by 20%. It is used on tanks and bruisers that value EffRes over Eff and don’t use Imm Set. It has the same stat efficiency as HP and Def sets, but comes in a much better hunt. If you happen to have good HP or Def gear already, then you wouldn’t lose anything by using them.
There is a Banshee 13 Guide that covers everything you need to know regarding both slow clear and one shot.
Golem 13 (G13)

Golem is not a hunt you want to be farming early. All of the sets are matched in value or worse than sets in other hunts. The free gear is fine to use since it’s free and can be useful early game, but you shouldn’t be spending energy to get any of this gear until very end game.
Attack set is a PvE set, increasing Atk by 45%. This set provides less value than Speed set from Wyvern and Destruction set from Banshee. The free Atk gear from the New Player Check In and the Hunt Expert Challenges are fine since they can be used on PvE units.
Health set is a PvE and PvP set, increasing HP by 20%. This set is a good 2 piece set for tanks that don’t want Immunity (Imm) set, a set from Aziminak. However, it is matched in value by Hit Set from Wyvern as well as Resist set, which drops from Banshee hunt and has much better sets paired alongside it. Typically Eff set, Res set, or Imm set is used on tanks instead since you’re more likely to have those sets due to never farming G13. You do get a lot of free HP gear though, so if any of it rolls well you can use it as your second set on any of your tanks.
Defense set is a PvE and PvP set, increasing Def by 20%. Similar to HP set, there’s not much merit to farming Def set gear out due to how bad this hunt is. If you got free drops from somewhere and it rolled well, then you can use it on a unit.
Protection set is a PvP set, giving all allies a barrier worth 12% of the set holder’s HP. Being a 4 piece set it’s pretty hard to slot in cuz any unit you use it on will be dirt slow. It’s usable on units that don’t really need Speed to function, but it’s definitely not worth targeting early.
You’ll need to clear Golem for Adventure Path and to clear the Golem Hunt Expert Challenge, so I’ll go over the best way to clear it without investing into otherwise useless units.
For Adventure Path, you only need to clear Golem 6 and then Golem 10. This can easily be done just using the units you have built such as Sigret, Furious, AMomo, and FSTieria, even with the elemental disadvantage. If you’ve already built units such as Adventurer Ras, Mercedes, Tamarinne, or Specter Tenebria, you can slot them in over the Ice units.
For Hunt Expert Challenge, you only need to do Golem 7 to unlock Cermia which is even easier. For the single Golem 13 clear, you can just do a manual run using the units you’ve built for Raid (or Expedition if you’ve already started doing that). An example team would be ARas, Meru, AMomo, Flex. The flex unit can be another healer such as Tama or MHazel, or another DPS unit like Cermia or Zealot Carmainerose. You should use souls on ARas S2 and kill the plant first then kill the Golem. If you have a source of Unhealable you can ignore the plant and just kill the Golem.
Expedition
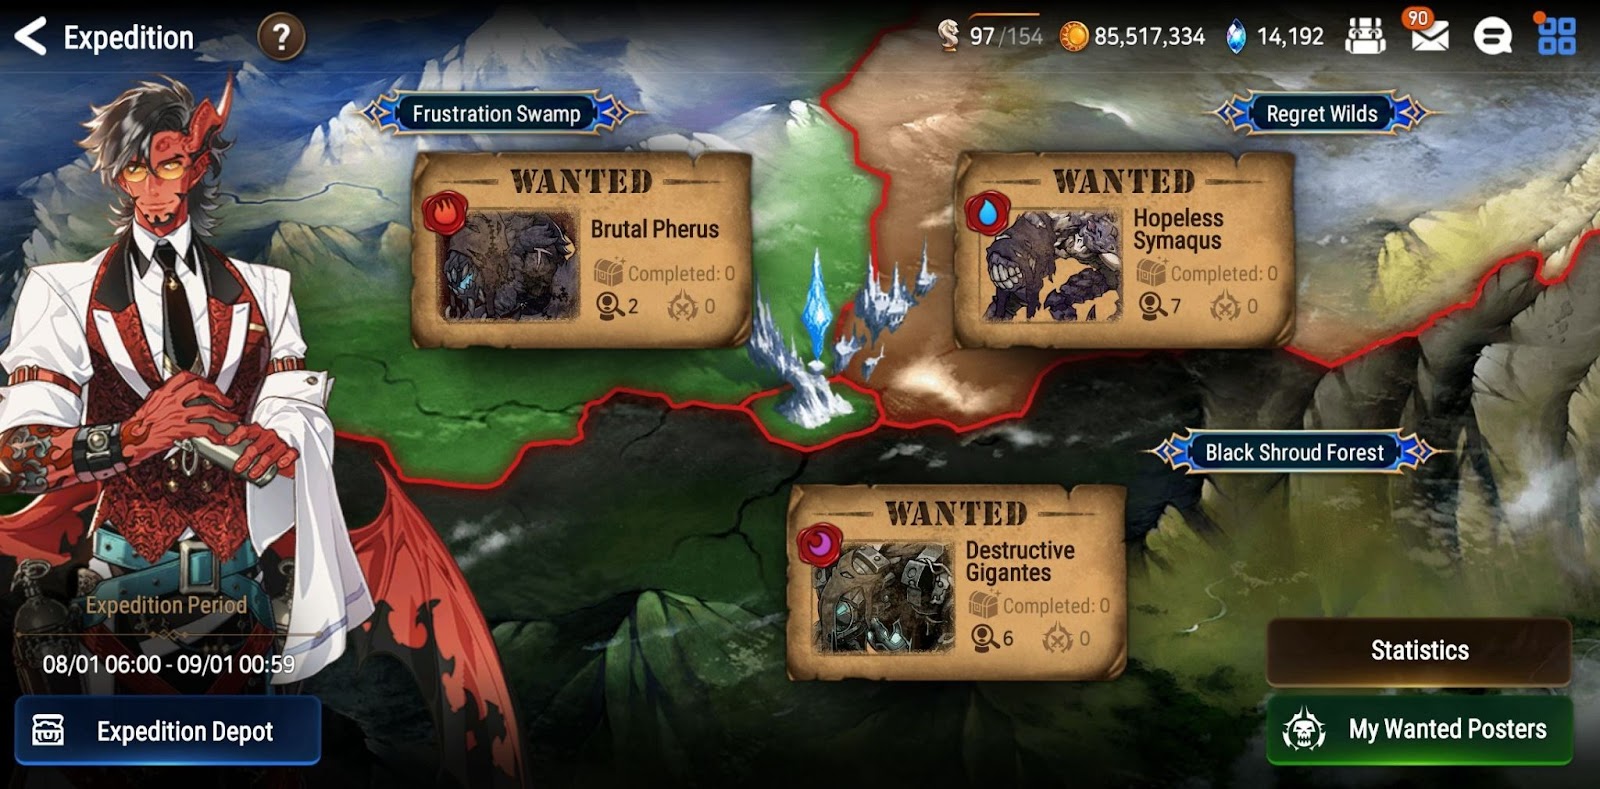
Expedition is unlocked after clearing any Hunt 8 stage. You can participate by getting Wanted Posters from farming Hunts level 8 and above or by hitting other people’s posters. Even if you can’t clear posters, you should always use your free entry, even if you instantly yield, since you get gold for each entry. If you’re going to do this you should probably not invite others though, since there is a limited number of expeditions that you can be invited to.
If you have a strong guild and/or friend (and they’re okay with this), you can hit their posters even if you can’t do much damage and let other people clear it. In general, the goal is to do at least 350k damage on each Level 3 Expedition so that you can unlock Open Expedition. This lets you hit posters posted by any player who makes their poster public at the cost of only getting 60 points per poster instead of 80. Once you’ve unlocked Open Expedition, you can dump all your energy at the start of the month and try to finish the rewards early. Pushing for higher damage values is nice for trying to clear your own posters more consistently though since people tend to hit lower health posters.
There is an Expedition Guide that goes over the rewards, mechanics and typical team compositions.
Expeditions are the primary source of substat modification gems, which allow you to modify one substat on a +15 piece of gear to a different substat. You can only modify one substat, or to be specific one line, per gear. The roll ranges scale based on how many rolls went into the line and have diminishing returns.
There is a Substat Modification Reference Sheet, showing all of the possible roll ranges with some additional notes regarding its mechanics.
Advent Side Story

Advent is unlocked after clearing Ep2 10-10. Despite the early unlock, it’s being listed all the way down here since it’s generally considered to be mid to late game content. You’ll need at least 9 units and the harder difficulties can be very challenging. This typically comes around every 4 or 5 months and last 3 weeks. There are currently 3 different Advents in rotation.
Advents are a great source of substat modification gems and have a bunch of other rewards in the shop as well. Clearing a stage will net you a random mod gem and some event currency. Each Advent side story has 6 gear sets associated with it. These 6 sets will determine the sets for the mod gems that you get as a drop from clearing stages, the random greater mod gem items in the shop, and the mod gem selector chests in the shop as well. The currency can be used in the shop to purchase the items mentioned earlier as well as some elemental bookmarks and other stuff.
The fight consists of a single boss with 3 separate phases. Each phase is fought using 3 unit teams that you have to set up before you enter the fight. There are 3 difficulties: Hard, Hell, and Epic Hell. Hard is typically clearable without much issue, but you’ll need to at least have the gear for 9 different units. Hell and Epic Hell are where it starts to get a bit harder, especially if you don’t have a lot of units and gear. Hard and Hell drop the same currency so it’s not a big deal if you can only clear Hard (Hell is just more energy efficient). Epic Hell drops a different currency and can only be cleared 5 times. In total you can get 20 of the special currency, 10 from Epic Hell clears and 10 from the shop using the normal currency. The special currency is used to purchase the mod gem chests and 3-5* Light or Dark elemental bookmarks. If you can’t clear Epic Hell you’ll miss out on the 2 mod gem chests for 5 of the sets, but there’s usually only 1 or 2 really good sets anyways. For the Light or Dark elemental bookmark, 4 of them are from the shop and the last one is in Reputation (the Epic Hell mission does not count).
Here are the existing Advents and their guides:
Kiss of Frost (Elisia of the Ice)
Enraged Blazing Emissary (Dazzled Magnar)
Nature’s Decline and Decay (Decaying Naturas)